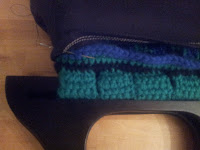
Hi all, I know a few people have been waiting for me to post this part of the Luck of the D purse! I am so glad I can help with your craft endeavors. Here are the instructions on how to add a fabric lining to a crochet purse. Enjoy!
Skill Level-Easy
What you will need:
Sewing Machine (regular thread to match your fabric)
Any color fabric (nothing too heavy or too stretchy)
Quilting thread to match your fabric
Scissors
Sewing needle
Cut out fabric (width 7 1/2 inches & length 12 inches). Pin the fabric together so, only three edges are pinned (two smaller sides and one larger side).
Sew fabric together in the pinned areas to make a pouch using the sewing machine. Fold down fabric and pin the top of the pouch (Pin two pieces of fabric separate from each other to make a opening) around. Sew around the pinned fabric (make sure your Fabric edges are sewn on the same side as you pouch edges).
Turn purse inside out, slip pouch over purse (This puts your edges inside to be hidden), Thread needle with 1 arms length (double string) of black quilting thread (tie in a double knot). Use the Crochet lip to attach to the purse pouch.
Insert needle from inside to outside of pouch on white stitch line (do not pull all the way through, insert needle back in through the pouch and in between the ending knot of the thread). Pull ending knot to fabric and pull thread through. Do a running stitch around the crochet lip and purse pouch.
- - - - - - - - - - -
What I did to attach the pouch and the crochet purse together is to go into the pouch and go into one stitch in the crochet bag and back out through the pouch again (all the way around). Then I do it again over the spaces without stitching so the stitch looks more like this:
-----------------
Make sure your stitching is not loose but, not too tight either (don't want it to bunch up).
 |
| (Note: do every other crochet stitch in the bag and use stitch marker to mark them. This will help when you do the second round of stitches, you would use the ones that don't have markers.) |
© Hooking Rainbow 02/28/2013. All rights reserved.


No comments:
Post a Comment